
So, recently me and my dad spent a couple of days building a super-simple home-brew set up with material supplied by Wickes (and a home-brew kit supplied by Home Brew Depot) and you can watch the video about how we built it here on YouTube and there's a bit of an emotional one here about how lovely it was to do this with my dad.
There will be more to come soon, including the recipe for the DIY IPA that I made as my first solo home-brew, yes, you read that right, first solo home-brew - and it doesn't suck!
Creating something of your own is a deeply satisfying thing to do. Brewing might become a lifelong hobby, or just an excuse to hang out with your friends, sitting in a comfy chair in your shed, drinking a few brews whilst your beer kit bubbles away in the background. Either way, it’s well worth trying your hand at it.
Once you’ve watched this video and read the step-by-step guide, you’ll know just how fun and easy it is to transform your garden shed into your very own ‘beervana’. It gives advice on how to construct a two-tiered frame to support the mash tun and hot liquor tank, how to assemble the fermentation and maturation units as well as how to secure them safely within the brewing shed.
Once you’ve watched this video and read the step-by-step guide, you’ll know just how fun and easy it is to transform your garden shed into your very own ‘beervana’. It gives advice on how to construct a two-tiered frame to support the mash tun and hot liquor tank, how to assemble the fermentation and maturation units as well as how to secure them safely within the brewing shed.
Preparation & Planning
Firstly, you need to decide on a suitable location to house your home brew. It should be somewhere dry where there is enough space to safely carry out the brewing process, so a garden shed, whether old or new, can offer the perfect spot.
Brewing tends to generate a lot of steam so if there isn’t much ventilation inside your shed then it’s best to waterproof it to help preserve the wood. You will also need to have access to a power source, we used an outdoor extension lead, but if you decide to put in a direct power source then it’s best to contact a qualified electrician.
We built our home brew to fit the available space within the 7X7 Wickes Barn Decorative Shed. However, you can adapt these principles and measurements to fit the space you have. Bear in mind that if you aren’t building your frames to the same size as ours then you will also need to find an alternative to the galvanised steel sheets, but be sure to use something sufficiently robust. If in doubt, consult Wickes staff in-store or via customer services.
Aftercare:
Once the build is complete you can add a padlock or an alarm to your shed to help keep your beery bounty safe.
It’s important to regularly clean and sanitise the brew shed and all the equipment, especially before and after use.
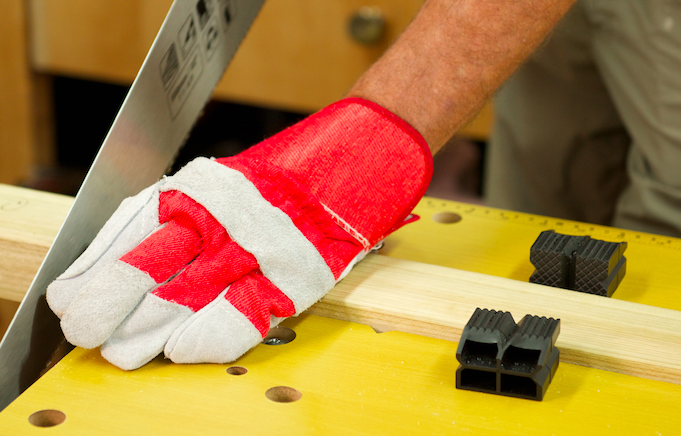
Hints & Tips:Making sure your measurements are accurate is key to ensuring that your frames are level. It’s best to mark the wood clearly before sawing so you have a guideline to follow, you can use the 90-degree guide marker on your saw or a set square to do this. Your two tiered frames also need to be structurally sound, as they will be supporting the weight of your hot liquor tank and mash tun, so it’s best to measure and mark out all pilot holes to ensure your fixings are as accurate so possible.
You can build your home brew on your own but it’s easier and much more fun with a helping hand, so ask a friend or family member if they can help out
Safety:
Make sure you firmly secure the timber and take care when sawing, drilling or routing. When drilling it’s also best to wear safety glasses and when routing you should wear glasses a dust mask and ear defenders. Wearing gloves when handling the timber is also advised.
We have designed our brew shed with a two-tier frame to make the brewing process much less labour intensive by utilising gravity. Positioning the kitchen units only a short distance away also makes everything easier to reach and much safer to lift. If you aren’t following our design then bear these factors in mind when planning the layout of your home brew.
Offcuts of treated timber should never be burned, but need to be disposed of safely – your local recycling centre should be able to advise.
STEP BY STEP: PREPARING THE FRAME:
We need to cut the wood for the two frames. The highest wooden frame is for your hot liquor tank (HLT) and the lower one is for your mash tun.
We need to cut the wood for the two frames. The highest wooden frame is for your hot liquor tank (HLT) and the lower one is for your mash tun.
Take your first piece of 45x70x2400mm Wickes kiln dried timber and secure it in your workbench. Measure and mark out three 460mm sections and draw guidelines then saw. With the remaining section, measure out and cut a 600mm section.

Write (in pencil) the length you have cut on each piece of wood and place together in a pile, do this for all the sections you prepare.

Take your second piece of 45x70x2400mm Wickes kiln dried timber and secure it in your workbench. Measure and mark out four 500mm.

Take your third piece of 45x70x2400mm Wickes kiln dried timber and secure it in your workbench. Measure and mark out three 600mm sections and cut. With the remaining section measure out and cut a 460mm piece.

Take your fourth piece of 45x70x2400mm Wickes kiln dried timber and secure it in your workbench. Measure, mark out and cut two 900mm sections. With the remaining section measure out and cut a 460mm piece.
Take your final piece of 45x70x2400mm Wickes kiln dried timber and secure it in your workbench. Measure, mark out and cut a further two 900mm sections and one more 460mm piece. You have now prepared all the timber sections for your frame. You should have 4 x 900mm sections, 4 x 500mm sections, 4 x 600mm sections and 6 x 460mm sections.

ROUTING THE FRAME Fit your router with the 20mm bit. Then, set your parallel guide to a width of 20mm and a depth of 5.5mm.

Secure one of your 460mm sections in your workbench with the 70mm side facing upwards. Rout all the way along the length of the wood. Repeat this for three more 460mm sections and the four 600mm sections.

ASSEMBLING THE TOP OF THE FRAMESTake one of the 460mm sections. Measure in 15mm and draw a mark. Then measure and mark a pilot hole at 25mm in from the opposite side to your routed edge. Repeat this at the opposite end.

Drill your pilot holes. Then, take your countersink bit and create countersunk holes at each end. Repeat this process on another three of the 460mm sections.

11. Take one of the routed 600mm sections. On the routed area, measure in 25mm from the far end and mark. Drill a countersunk hole and then repeat this at both ends of all the 600mm sections.

12. On one of the 600mm sections, from the opposite side of the routed edge, measure and mark pilot holes at 15mm and 55mm for the end. Drill your pilot and countersunk holes and repeat at each end of all the 600mm sections.

Now it’s time to glue and screw your frames together. You might want to ask someone to help you with this step - it does make life a little easier but it’s not totally necessary. Make sure you’ve got an extra set of protective gear for them though, no one likes splinters!
Secure one of the 600mm sections onto a large level surface using clamps.

14. Take one of the 460mm sections and add wood glue to the end you will be attaching to the 600mm section. Make sure the routed edge will be facing inwards.

Put the 460mm section into position, making sure the edges are flush and either ask someone to hold it or clamp it in place. Then, extend the pilot holes at 15mm and 55mm so they go through into the 460mm section.

16. Fit your drill with the screwdriver bit and 100mm screws and secure in both holes on each corner. Repeat this on the opposite side to create the top of your first frame.

17. Take a 460mm length and add wood glue to each end. Then, place it exactly in the centre of the square frame and flush with the level of the routing. The 70mm side should be facing upwards. This piece of timber will act as extra support for the hot liquor tank and mash tun.

18. Secure this section by drilling a 5mm pilot hole and countersunk hole on each side before fixing in place with 100mm screws. Repeat the above steps to create the top of the second frame.

19. To attach the legs to your frame, turn the frame upside down and clamp. Move the edge of your frame off the side of the workbench, just enough so that you will be able to drill the legs in place.

20. Glue the end of the legs that will attach to frame and put it into position, making sure someone is holding them firmly in place for you. Drill through the pilot holes into the leg before securing with two 100mm screws. Repeat this process until all legs are in place on both frames.

21. Turn the frames the right way up and further tighten the screws.

PREPARING THE BATTENING
22. Take your first piece of 25X38X3600mm treated roof batten and secure it in your workbench. Measure and mark three 975mm sections and then saw.

23. Take your second piece of 25X38X3600mm treated roof batten and secure it in your workbench. Measure and mark out another 975mm section and saw.

24. From the remaining length of baton measure out and mark five 150mm sections. These will form the chocks that will give the batten extra support and make it easier to attach.

25. From the floor at the back left of your shed, measure 860mm up the inside of the shed’s vertical battening and clearly mark with a line. Then, repeat this on the middle vertical batten.

26. Measure and mark out 510mm up from the floor on the same two vertical battens. Then, repeat this on the front left vertical batten so that all 3 sections of batten on the left hand side of the shed are marked.

SECURING THE BATTENS
Secure one of your 460mm sections in your workbench with the 70mm side facing upwards. Rout all the way along the length of the wood. Repeat this for three more 460mm sections and the four 600mm sections.
ASSEMBLING THE TOP OF THE FRAMESTake one of the 460mm sections. Measure in 15mm and draw a mark. Then measure and mark a pilot hole at 25mm in from the opposite side to your routed edge. Repeat this at the opposite end.
Drill your pilot holes. Then, take your countersink bit and create countersunk holes at each end. Repeat this process on another three of the 460mm sections.
11. Take one of the routed 600mm sections. On the routed area, measure in 25mm from the far end and mark. Drill a countersunk hole and then repeat this at both ends of all the 600mm sections.
12. On one of the 600mm sections, from the opposite side of the routed edge, measure and mark pilot holes at 15mm and 55mm for the end. Drill your pilot and countersunk holes and repeat at each end of all the 600mm sections.
Now it’s time to glue and screw your frames together. You might want to ask someone to help you with this step - it does make life a little easier but it’s not totally necessary. Make sure you’ve got an extra set of protective gear for them though, no one likes splinters!
Secure one of the 600mm sections onto a large level surface using clamps.
14. Take one of the 460mm sections and add wood glue to the end you will be attaching to the 600mm section. Make sure the routed edge will be facing inwards.
Put the 460mm section into position, making sure the edges are flush and either ask someone to hold it or clamp it in place. Then, extend the pilot holes at 15mm and 55mm so they go through into the 460mm section.
16. Fit your drill with the screwdriver bit and 100mm screws and secure in both holes on each corner. Repeat this on the opposite side to create the top of your first frame.
17. Take a 460mm length and add wood glue to each end. Then, place it exactly in the centre of the square frame and flush with the level of the routing. The 70mm side should be facing upwards. This piece of timber will act as extra support for the hot liquor tank and mash tun.
18. Secure this section by drilling a 5mm pilot hole and countersunk hole on each side before fixing in place with 100mm screws. Repeat the above steps to create the top of the second frame.
19. To attach the legs to your frame, turn the frame upside down and clamp. Move the edge of your frame off the side of the workbench, just enough so that you will be able to drill the legs in place.
20. Glue the end of the legs that will attach to frame and put it into position, making sure someone is holding them firmly in place for you. Drill through the pilot holes into the leg before securing with two 100mm screws. Repeat this process until all legs are in place on both frames.
21. Turn the frames the right way up and further tighten the screws.
PREPARING THE BATTENING
22. Take your first piece of 25X38X3600mm treated roof batten and secure it in your workbench. Measure and mark three 975mm sections and then saw.
23. Take your second piece of 25X38X3600mm treated roof batten and secure it in your workbench. Measure and mark out another 975mm section and saw.
24. From the remaining length of baton measure out and mark five 150mm sections. These will form the chocks that will give the batten extra support and make it easier to attach.
25. From the floor at the back left of your shed, measure 860mm up the inside of the shed’s vertical battening and clearly mark with a line. Then, repeat this on the middle vertical batten.
26. Measure and mark out 510mm up from the floor on the same two vertical battens. Then, repeat this on the front left vertical batten so that all 3 sections of batten on the left hand side of the shed are marked.
SECURING THE BATTENS
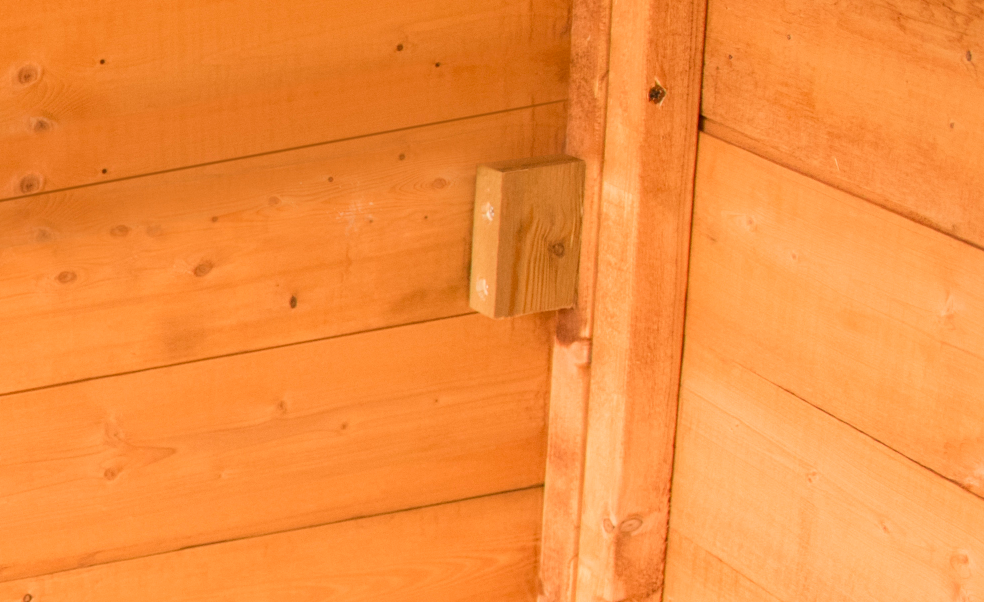
27. You will need to add chocks where it isn’t possible to drill directly through the vertical batten to secure the horizontal batten in place. In this case, we need to add 5 chocks. Start by measuring 50mm down from each end of the chock and drilling pilot holes with a 5mm drill bit. Then apply wood glue and line the chock up with the top of your pencil mark. Secure with two 80mm screws and repeat for the rest of the chocks.
28. Place a 975mm section of batten onto the lower chocks and drill a pilot hole through the batten and into the chock, make sure that you do this off centre so as not to clash with other screws. It’s also best to countersink all screws throughout the battening process. Secure the baton to the chock with an 80mm screw. Repeat this for the other lower section.
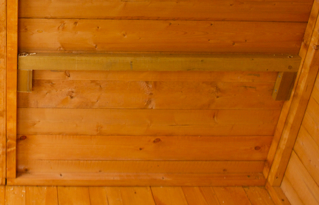
29. To attach the batten at 860mm, apply wood glue to the end that will not be resting on a chock, then, ask someone to hold the batten in place for you. Drill pilot and countersunk holes through the vertical batten and into the side of the horizontal batten. Secure with an 80mm screw.

30. Then, on the back right hand corner and centre right hand wall vertical battens mark a line 200mm below where the highest point of your cupboards will be. Then, add the last chock and secure your final section of 975mm batten as you did on the opposite side of the shed by drilling through the centre vertical batten to secure it.

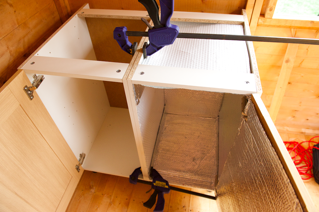
ATTACHING THE FRAMES
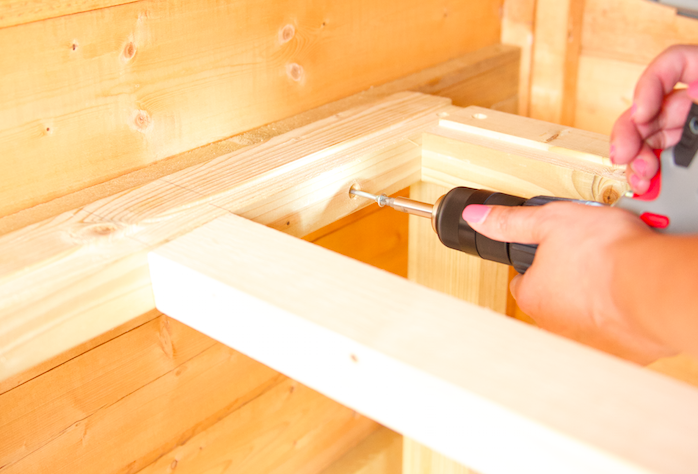
31. Bring your frames into the shed and put them into position up against the batten. Use your 5mm drill bit to drill a pilot hole half way between the central support and the frame on both sides.

32. Secure to the batten with an 80mm screws through each pilot hole.
33. Once the frames are secure, put on your gloves before taking two of the galvanised sheets and placing them side-by-side into the large frame.

34. Then take the second two sheets and lay them crossways on top.

35. Take the final two sheets and fit them in the same direction as the first two. Laying them like this will give extra support.

36. Repeat this process for the smaller frame.

ASSEMBLING THE KITCHEN UNIT
37. Assemble your kitchen units on a firm surface and be sure to follow manufacturers instructions. It’s best not to join the cupboards together at this stage as it will make them easier to handle and to fit the insulation.
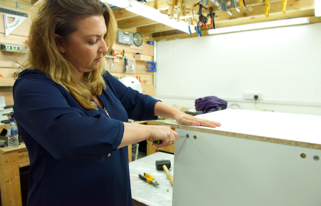
38. Take one of your cupboards and measure all the interior surfaces, including the top which is currently not covered but will also need insulation.

39. Using a Stanley knife, cut out the six pieces of insulation foil you need but make them slightly larger than each of the surfaces. This will allow a slight overlap to ensure there isn’t any gaps.

40. Using a staple gun, staple the insulation foil into place on all the interior surfaces.

41. Move the cabinets into position up against the back right hand wall of the shed and follow manufacturers instruction to attach the two kitchen cupboards together. Then, secure them to the batten using the provided attachments.
42. Place your laminate worktop onto your workbench and clamp. Cut the worktop to 100mm longer than the width of the cabinets to allow for a slight overhang. Then, fit as per manufacturer's instructions and use provided edging tape to finish the cut end.
28. Place a 975mm section of batten onto the lower chocks and drill a pilot hole through the batten and into the chock, make sure that you do this off centre so as not to clash with other screws. It’s also best to countersink all screws throughout the battening process. Secure the baton to the chock with an 80mm screw. Repeat this for the other lower section.
29. To attach the batten at 860mm, apply wood glue to the end that will not be resting on a chock, then, ask someone to hold the batten in place for you. Drill pilot and countersunk holes through the vertical batten and into the side of the horizontal batten. Secure with an 80mm screw.
30. Then, on the back right hand corner and centre right hand wall vertical battens mark a line 200mm below where the highest point of your cupboards will be. Then, add the last chock and secure your final section of 975mm batten as you did on the opposite side of the shed by drilling through the centre vertical batten to secure it.
ATTACHING THE FRAMES
31. Bring your frames into the shed and put them into position up against the batten. Use your 5mm drill bit to drill a pilot hole half way between the central support and the frame on both sides.
32. Secure to the batten with an 80mm screws through each pilot hole.
33. Once the frames are secure, put on your gloves before taking two of the galvanised sheets and placing them side-by-side into the large frame.
34. Then take the second two sheets and lay them crossways on top.
35. Take the final two sheets and fit them in the same direction as the first two. Laying them like this will give extra support.
36. Repeat this process for the smaller frame.
ASSEMBLING THE KITCHEN UNIT
37. Assemble your kitchen units on a firm surface and be sure to follow manufacturers instructions. It’s best not to join the cupboards together at this stage as it will make them easier to handle and to fit the insulation.
38. Take one of your cupboards and measure all the interior surfaces, including the top which is currently not covered but will also need insulation.
39. Using a Stanley knife, cut out the six pieces of insulation foil you need but make them slightly larger than each of the surfaces. This will allow a slight overlap to ensure there isn’t any gaps.
40. Using a staple gun, staple the insulation foil into place on all the interior surfaces.
41. Move the cabinets into position up against the back right hand wall of the shed and follow manufacturers instruction to attach the two kitchen cupboards together. Then, secure them to the batten using the provided attachments.
42. Place your laminate worktop onto your workbench and clamp. Cut the worktop to 100mm longer than the width of the cabinets to allow for a slight overhang. Then, fit as per manufacturer's instructions and use provided edging tape to finish the cut end.

43. Finally, move your brewing kit into position and then that’s it, you are done and ready to brew!

This post is part of a job I did for Wickes


